
![]()
![]()
![]()
![]()

![]()
![]()

![]()
![]()
I will still accept e
Silicone Rubber Molding (Block)
This is an image-intensive article. Please be patient while they all load.
Block-molding is ideal for pieces that are soft and pliable that you wouldn't want to put clay next to for seaming. It is also good for casting one or two pieces as you don't have the labor invested in claying up for seams (however you lose the precision of those placed seams). While it's very little labor, it does use a lot of rubber. So what you save yourself in time, you lose in material. I've still found this to be the most efficient and reliable effort to reproduce my original clay sculptures with.
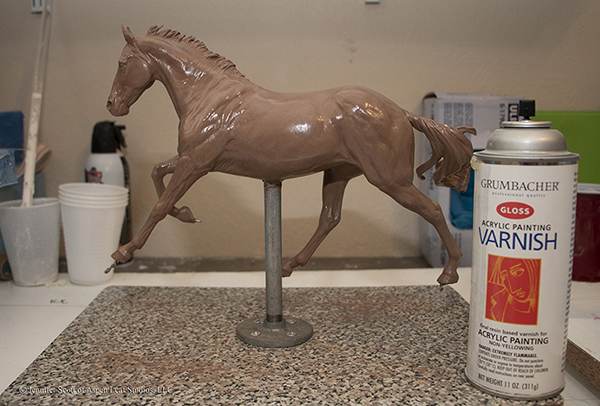
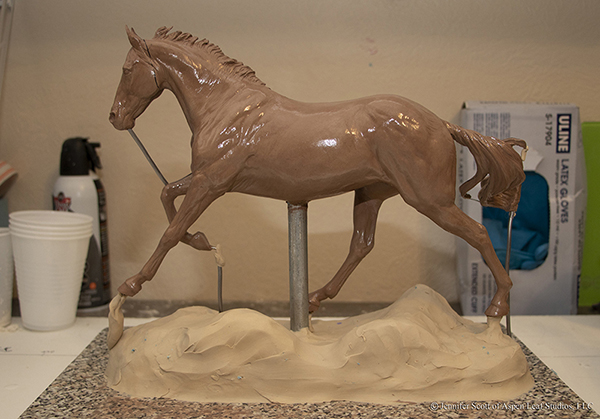
STEP 1: You'll need to seal your clay before getting ready to pour rubber. This prevents any cure-inhibition trouble, which is a nasty situation. My clay has sulfur in it, so this is absolutely not optional. It's a simple step that provides a lot of insurance, so whether your clay has sulfur or not, just spray a layer. It just takes one and takes less than a minute to do so.
I like to use the same gloss varnish I do for my final paintwork sealing. I have the cans around already and the glossy lets me see where I've sprayed and where I've missed! It's an excellent wall between the rubber and the clay, which is the whole point.
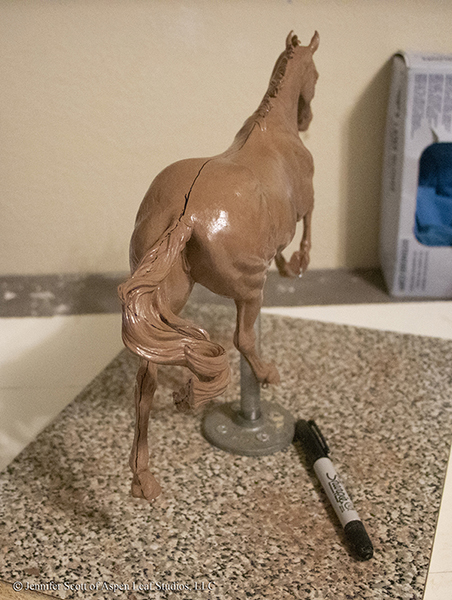
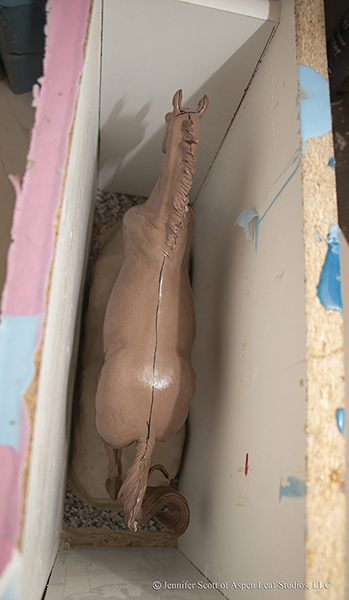
STEP 2: You'll want to map out your mold seam lines. These lines will guide your cutting when you can't see 99% of the horse encased in the cured rubber later. Even if you think you know every square inch of your piece, you will lose your way during cutting without them. Trust me. :) A sharpie marker with a good tip works well as it won't smudge. You'll have to draw with the lightest of pressures so you don't drag the sealer or clay around.
As far as where to place them, that's tricky. Moving horses with no overlapping legs (while viewing from the side) are easiest as you can just draw your seams around the outline of the horse. In Anise's case, her front legs overlap. If you have a horse with an area like that or a standing horse, I will choose a leg to go around the outline of for the split of my two pieces of rubber and then splice (or cut with my x-acto knife) through the rubber to create an opening I can pull the leg through. The final mold image at the end may give you a clear picture as to what that actually means. Because Anise's face sprue (see next step for details) is connected to her knee and I will need that on the seam so I can easily pull out that rod of resin (which is what it becomes after the pour), I am "outlining" the raised leg. It's also kind of a pain to pull out curved legs from a cut/splice in the rubber so that straight profile of the left front was a much better option to burry in rubber and cut out.
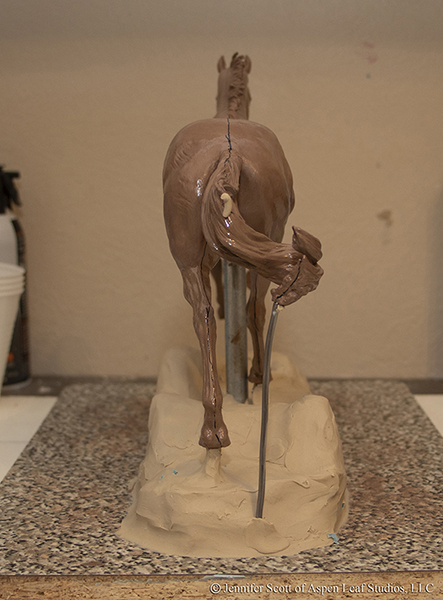
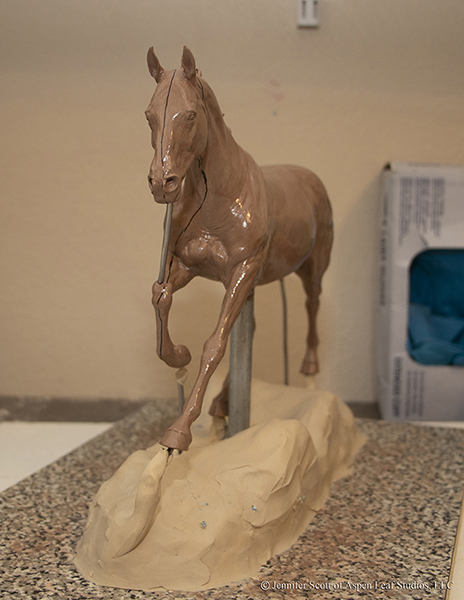
STEP 3: Sprues. Sprues are air vents that will allow for the air that's being replaced by the poured in resin to escape the mold. Without these, air would become trapped in certain places. These pockets of air are then empty of resin, which means you've wasted your cast or will be doing a lot of sculpting work on your cast later.
To determine the placing of sprues, you're going to have to figure out which way is best to pour the horse. For the majority of cases, the horse will cast best upside down. This is because there's not a lot of things sticking out the top of a horse, but there are legs going in all different directions plus tails and noses that will all be potential traps. In an original sculpture on an armature's case, which is 99% of block molding, your pour spout is the center armature post and you're pretty much forced to orient everything around it regardless. So, Anise, like all her clay predecessors, is going to be cast upside down with this mold. So now we have to envision her upside down and look at all the places air could get trapped. The nose and legs and tail are the obvious answers, however there's a couple more hidden areas in this piece too. Those tail strands may be pointing down in the photo above, but they'll be pointing up when Anise is upside down, creating a spot to catch air. The easiest way to vent those, is to just connect them back to the closest piece of the tail in the seam part. Remember sprues may be channels for air to escape, but as the air does escape, it's replaced by resin and we'll need to be able to pull those now-resin sprues out. Keeping them on a seam part makes that easy. Otherwise you will have to make a splice to get to them. The less cuts in your rubber you make, the better. Also, Anise doesn't have them, but boy parts on geldings and stallions will also require sprues.
My sprues are made up of soldering wire or clay. Usually long areas I use the wire for as it's a quick and easy way to do that. I can also pierce through the clay like I did in the nose and knee for a connection. Areas like the bottom of the feet where it helps to have a larger sprue I typically use the soft molding clay for. You can also cut your sprues out later in the cured rubber, but I find it easier to just have them already made so you don't miss a spot in your initial casting.
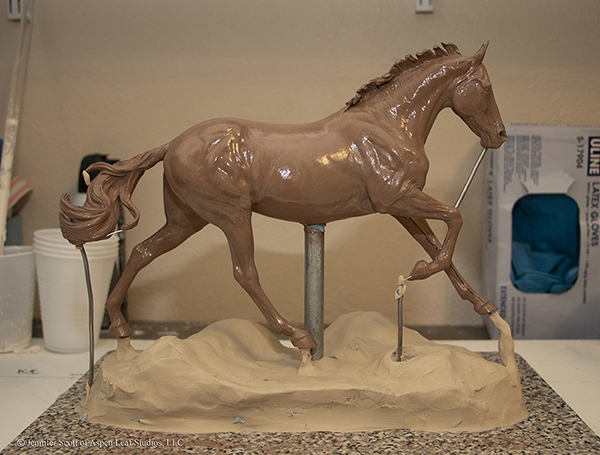
So the clay base here is actually not something I usually do.
Because the lowest part of Anise was so far up from the base surface, I decided to fill that area a bit to save on at least a third of a gallon of rubber (not cheap stuff). I'm quick at smudging the clay around, so it was worth the savings. However if it takes you hours to form this base, then just leave it out and use more rubber in your mold to fill. Remember time is money. You need to really take a look at what your hourly rate is and compare it to the dollar saving in material used. Honestly, I probably wouldn't do this again. It was actually a bit of a pain removing when I tried to get the rubber off the stand later. If you do this though, remember to really think. Your resin will be coming out of sprues, so you don't want those to be the lowest spots (which are the hills in this case are because remember - upside down) otherwise you're then wasting resin filling that crater. I'm making my low points where there's no resin or sprues. I am also making high points around those resin/sprue areas to give them a nice wall to fill up to.
Anise's armature had wire sticking out of her feet so I'm just connecting clay to some of those for her sprues. They don't have to be pretty as I can clean up areas later by slicing them out of the rubber.
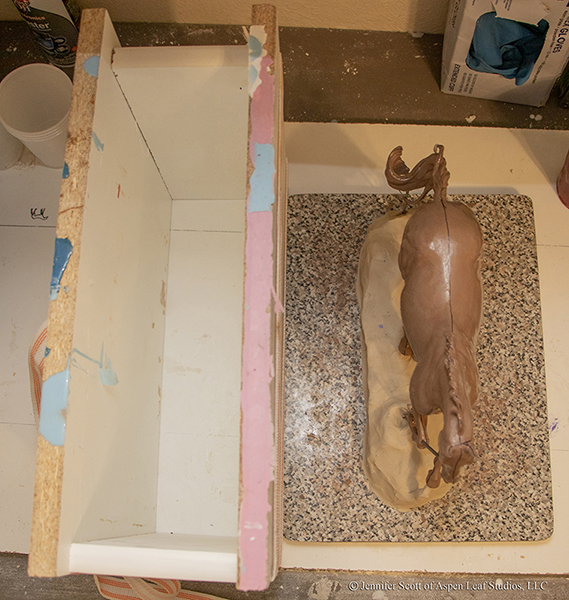
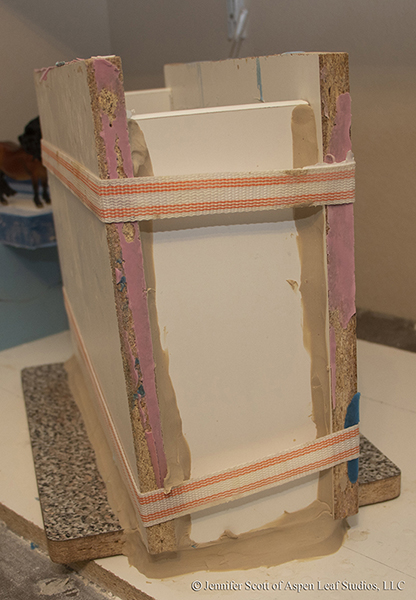
STEP 4: Measure your horse for an appropriate sized mold box. Let's talk about mold boxes for a bit. The raw rubber is liquid and it needs a container around your horse to hold it in place while it cures. You'll see a lot of people who use Lego's. I personally despise Lego's. They take forever to put in place and then rubber leaks through the cracks or seams of them and they're just a pain to remove. I love mold boards. I don't recommend wood as the open grain makes them hard to peal away from the cured rubber, even with mold release. I have had great success with these melamine boards. They're in the shelving departments at the big box stores like Home Depot or Lowes. They're cheap, can be cut down to any size you want, and best of all, reusable. Slap a mold strap around these babies and I've got my mold box set up in under a minute. Now think about assembling a stupid Lego wall for hours and then realizing you have three more to do and I'll leave it to you to figure out what's best.
Now that we know what to use to make our mold box, let's go back to measurements. On the sides there'll be a seam (like the head side, tail side, top, and bottom, I like to have about 1" of rubber around the most extreme part of the horse. On the side where you won't have a seam, 1/2" - 1" works. My rubber is a 30 shore hardness. The greater that number, the firmer the rubber - which technically means the less thickness needed. So for example: if your horse is 12" long from its front most point to its rear-most point, then ideally you have a mold box that is 14" long (an inch on each end). If he's 8" tall then I would want a 10" tall pour - and your box should be a little taller than that so you have room to pour and some "whoops" space. Now for the width, remember since there won't be a seam or slicing done through the side, if I have a horse that is 3" wide, then I may just do a 4.5" width mold. You will need to leave extra length to cover the width of the side or front boards depending on where you feel most comfortable overlapping. I personally like to have a longer side board and cut to size head and tail boards. That way I can typically use the side boards, which is the measurement that varies most in sculptures, for multiple pieces. The width tends to be pretty similar from piece to piece and very rarely do I have to cut new head/tail boards.
So now you know the sizes to cut the boards down too, you need to put them together. Enter mold straps. The 4' length mold straps (orange ones) work well for most all traditional size pieces. The 3' ones can be too short for some molds and the 5' ones end up with so much strap hanging all over the place that it's a hazard. There are youtube videos on how to put these together. You'll want to save the video link because you're going to be watching it over and over until you've strapped something a hundred times. Straps are great because they clamp the boards tightly together without piercing holes in them (like a screw or nail will) and they will not loosen until you unclasp them. Totally secure, totally adjustable, and takes 2 seconds.
STEP 5: Assemble the box and dry fit to horse. I like to do this away from the horse because the boards typically fall a couple of times before I get them strapped together! It's best if they fall on nothing rather than your sculpture if it was inside!
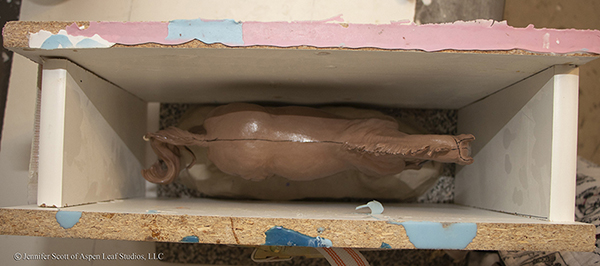
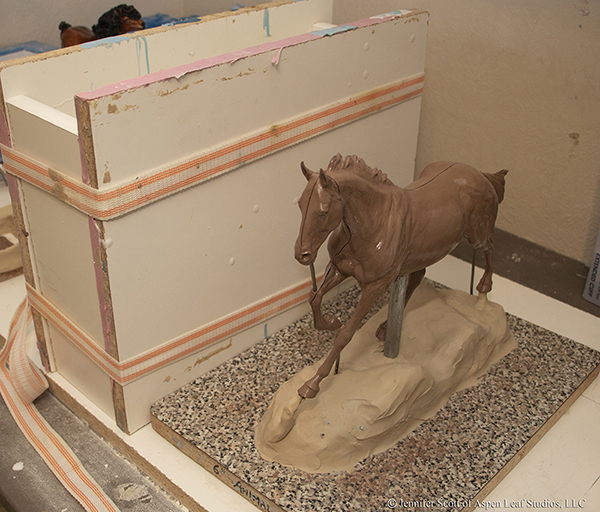
STEP 6: Place the mold box over the horse. All looks well in size so we're ready to start sealing up the box to make ready for pouring rubber in.
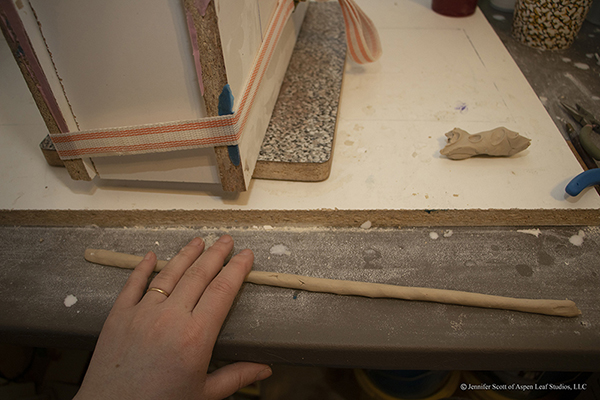
STEP 7: We'll start by taking some soft clay (Sculptex or Klean Klay work great) and roll it up into a big noodle. These initial noodles will then get pressed around the bottom edges of the box to prevent leaking out the bottom.
Press the noodles down lightly at first until you have one on each side to keep the mold box from shifting. You'll have to hold your mold box with the other hand for the initial two sides to keep it from moving around.
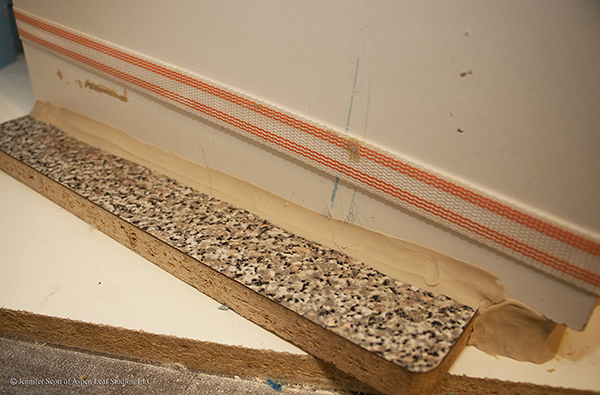
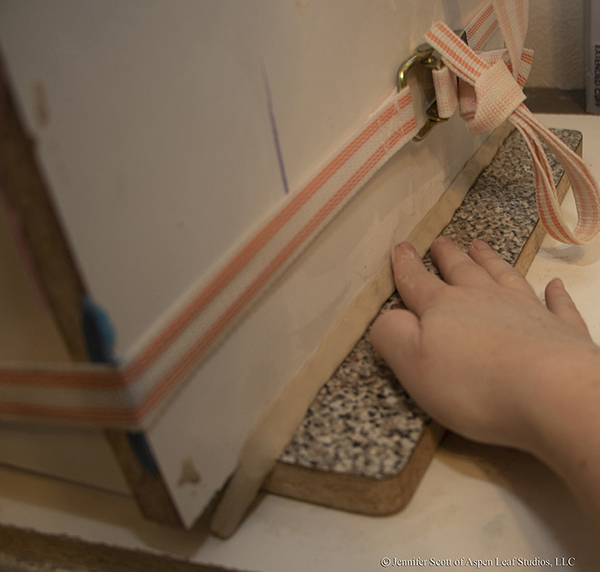
Then really put some pressure and smear the clay in with your finger. It's important to press it into the corner and get a good seal. If you don't have the strength or your index finger hurts while trying to smear your seal, use your thumb. Also, kneading the clay a little to soften it beforehand will help the smearing. You don't need three inches of clay around the bottom, just a couple of finger-widths will do. The pressing in is the important part. Make sure your edges are pressed down as well.
When you're done with the bottom, you've got two sides to seal around next! If you don't have space between the side board and the mold straps, then you can unclasp a strap at a time and clay up that area before locking the strap back on.
In Anise's case (and frankly just about all of their cases), the walls extend past the armature base's length. Not a big deal. Just wad clay under there.
You'll need to make sure the seal on the inside is just as good as the seal on the outside here where those boards extend past the base. I used a very long paint brush handle to smudge the clay around the edges to make sure no rubber would be able to leak out.
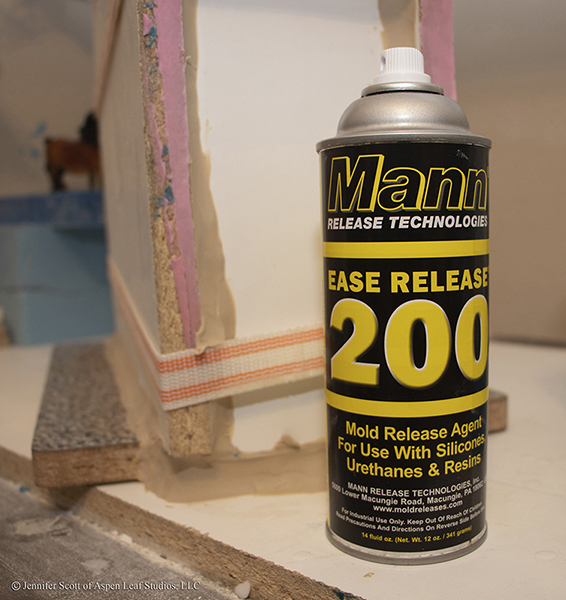
STEP 8: The all-important mold release step that you will inevitably at some point(s) forget. You won't be too SoL here as you would be during a place where you don't want two pieces of rubber to stick to each other, but make sure you remember to spray the release. "Release before rubber" should be your constant mantra during molding.
STEP 9: Mix and pour your rubber. You'll want to wear gloves. Now, the ratio of Part A to Part B will depend on the rubber you use. Stick to manufacturer's instructions and really do be as precise as possible. It makes a difference. For my clay masters, which have sulfur in them, my go-to rubbers are Smooth On's "Mold Max XLS II" (first choice) and Smooth On's "Mold Max 30" (just about the same product, but not quite). Make sure you do not buy your rubber until you're ready to use. There is a shelf life on rubber and these two will get so thick and globby as to become worthless after so many months. Always order from a supplier who cycles through product quickly - like a main distributor (Reynolds Advanced Materials is Smooth On's). The smaller art stores tend not to turn over product, and you can lose months off that shelf life because it sat on someone else's shelf a while before it came to you.
You'll only want to mix the amount of rubber you need for the application. Err on the side of not enough - you can always mix more. If you mix too much, that extra rubber is going to cure and you've lost/wasted it.
The next step depends on whether you are vacuuming/degassing your rubber in a chamber or not.
If you have a vacuum chamber, then put your rubber in a container that holds 3x more rubber than you are vacuuming (rubber will expand during degassing) into your chamber, close the lid, and turn on your vacuum pump. You MUST vacuum to 30 inches of mercury or you're not vacuuming at all. The only exception is if you're at 9000 ft elevation like I am! Then you can vacuum to 22 because the air is thinner up here. Let the rubber fully expand at those levels and then after it collapses back down, wait one more minute and turn off the pump, open the lid and take out your rubber. It's ready to pour!
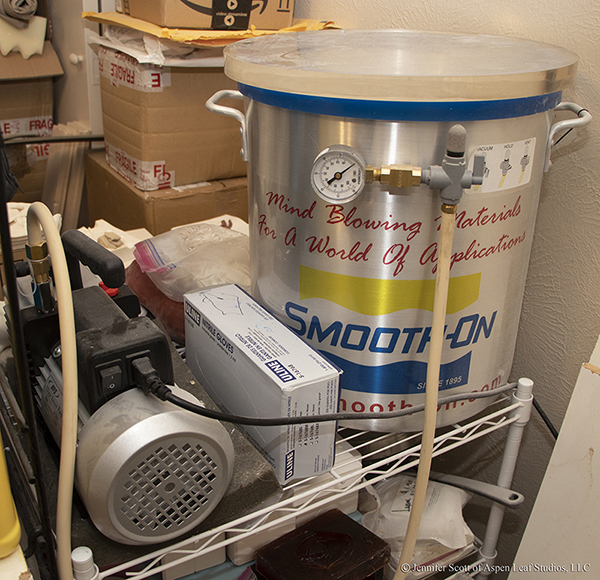
(my vacuum chamber and pump)
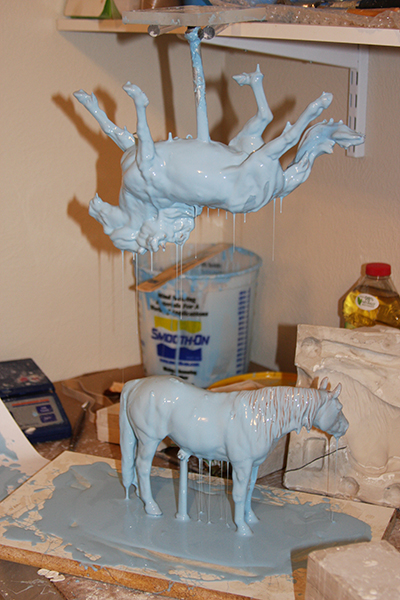
If you will NOT be degassing your rubber,
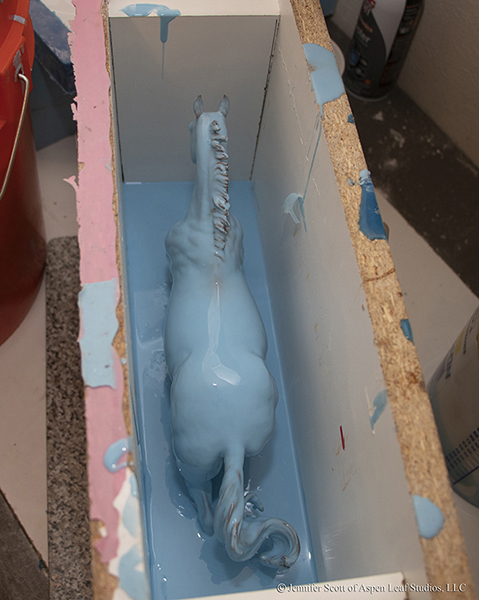
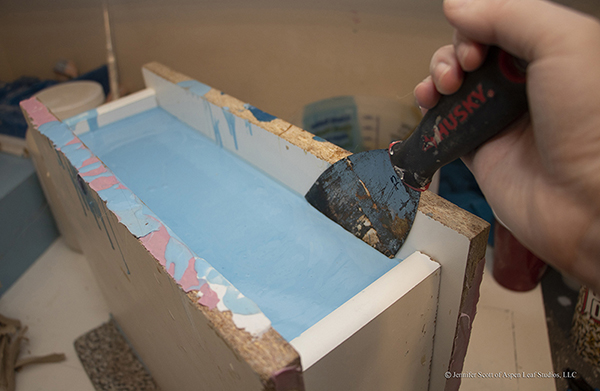
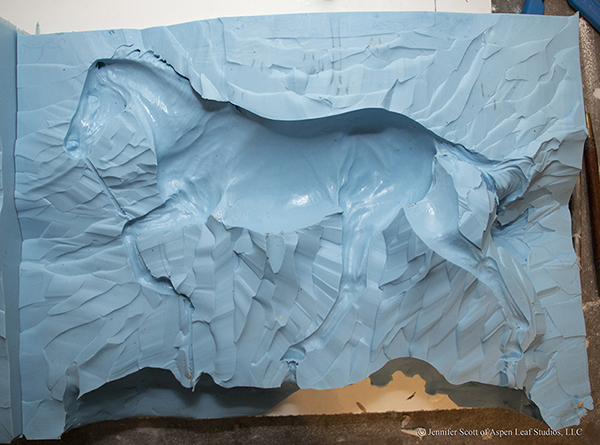
Then you will need to mix a small amount of rubber and pour it on to your piece in a drip layer. It's best to do this outside of the mold box actually so you have room to get all the angles. You'll need to pour a thin layer of rubber onto your piece, let it cure, and then repeat once or twice. The idea is you now have a smooth shield of rubber around your piece between any trapped air bubbles in the rubber during the big box pour. You will not be pleased with the results if you skip this step. I have not tried it myself, but you could probably get a thickening agent and brush on the initial coating(s). The picture below is an example of the drip process.
Once you've either vacuumed or gotten your drip/brushed on shell, you're then ready to pour the rubber into your mold box. Now, as tempting as it may be to pour all the way up to top level you need, RESIST! Do NOT pour the whole mold at once. That is so much pressure that you are going to get a leak somewhere. I have never failed to have one no matter how many times I try. So, the SMART way to do it, is to only pour an inch or so of rubber into your mold and STOP. Let that cure.
This completely seals up your box. Also, you want to introduce as little air as possible into your rubber. So, when you pour, pour from high up in a thin stream, and pour into the lowest point in your mold box. The rubber levels can slowly rise from there.
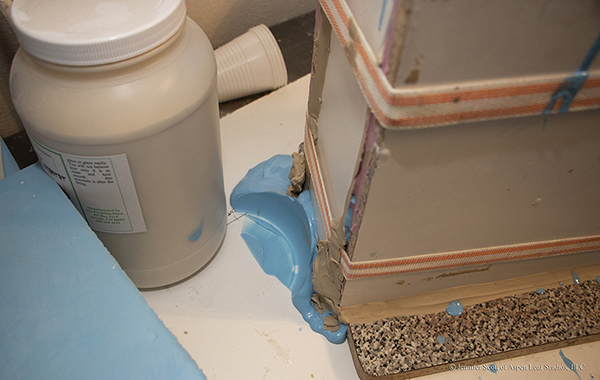
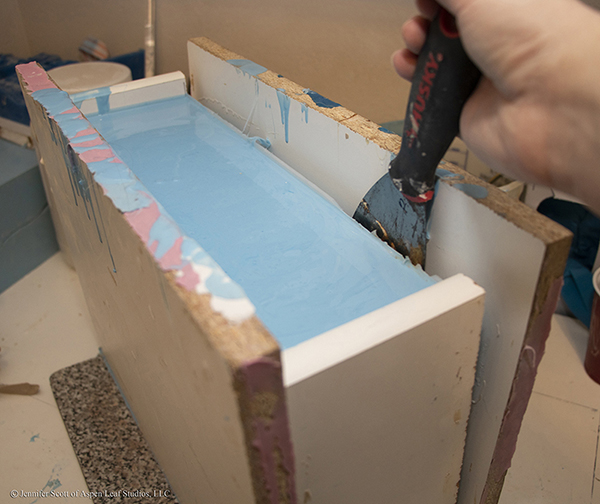
Mold leaks. Every time I try to do more than the initial small pour, I get one. Every. Time. In this case, the clay was fine, it was the wall itself that didn't hold and shifted out. Don't panic. Either squish more clay, or in my case, find a heavy container that won't stick to the rubber (like a plastic one filled with porcelain clay slip ;) ) and create a support so the wall doesn't open up. The rubber had congealed enough that I didn't lose much. Only about 1/8" off the top of the entire mold.
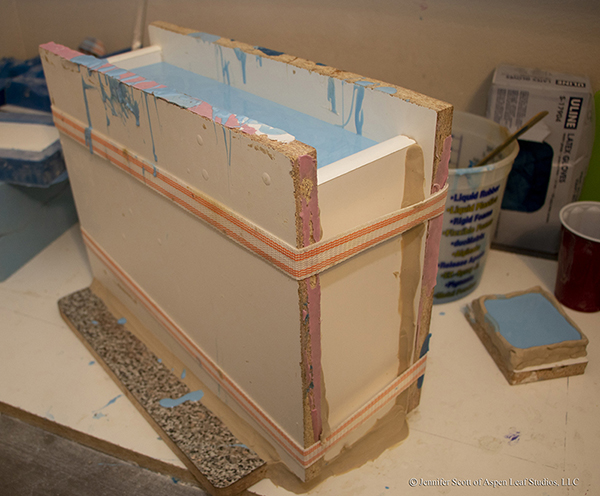
STEP 10: After your initial cure and all your walls are securely glued down at that point, pour the rest of your rubber and take it all the way up to your top inch mark needed - I like to draw a line on the board before pouring the rubber so I remember exactly where that top point should be.
Anise, with the clay on the base, took about 2 2/3 gallons. Usually, my resins end up in that 3 gallon range depending on their position. Something with its head up and all that empty space behind the head above the back can take more unless I use a filler. The fill in this case, is chopped up previous molds made from the same rubber. In that I'm not using a mold release on those chopped up pieces, they will automatically bond with the raw rubber in this mold. It's a nice cost-effective way to recycle those dead molds. Just make sure you cut off the surfaces of the previous mold pieces that had mold release on from prior uses. Otherwise they won't bond.
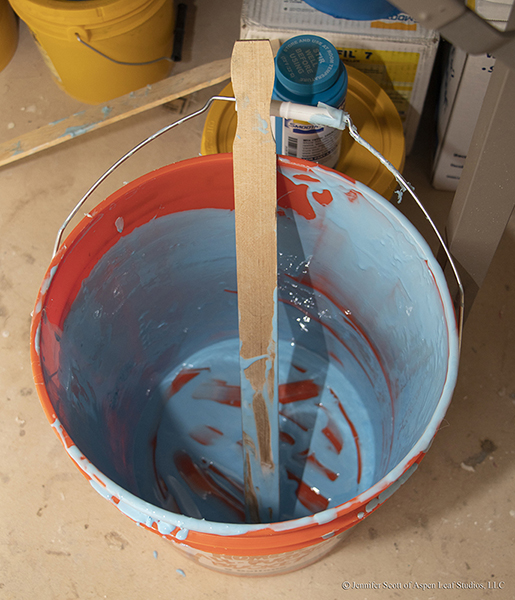
This is the only time it's okay (and encouraged) to let your buckets sit dirty! Raw rubber is a disgusting mess that will just smear everywhere when you try to wipe it up. It's best to wait for it to cure on your buckets and then just peal it off!
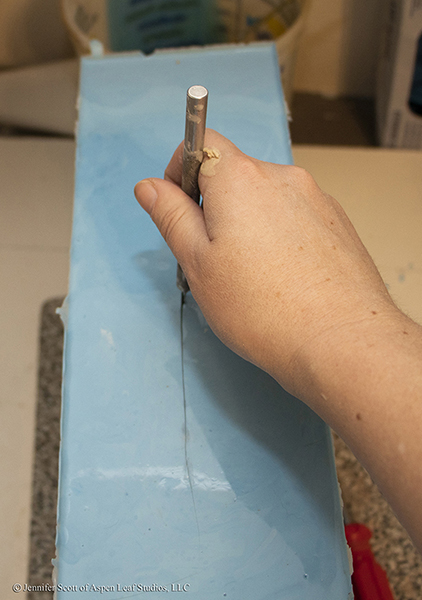
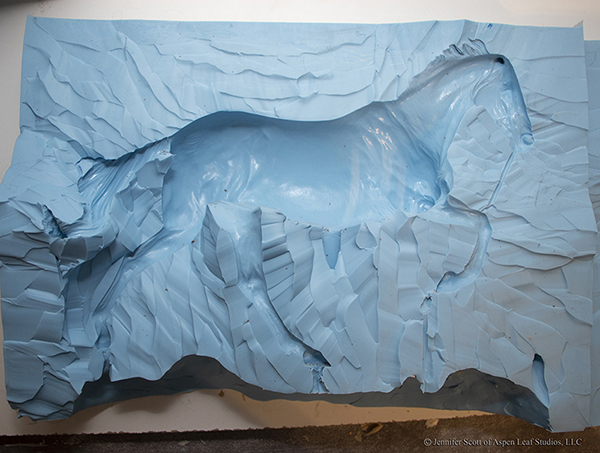
STEP 11: Your rubber has cured and it's time to get those boards off! I use a spatula to carefully break the seal on the top of one long side.
Then I'll gently rock it downward so I can have some leverage and begin to pry the board away from the mold. It will take some pressure at first. As the rubber starts to release it, lessen your pressure or by the time it has completely released you'll send that board flying!
STEP 12: Time to cut it open and see what you have! The excitement is mounting, I know. ;) I like to start on the top middle as the back is a pretty easy area to find. Make sure your scalpel or x-acto knife is sharp and this will go much easier for you. As you make your slice, you'll want to pull the rubber you're cutting into apart. That stretch of the seam makes that knife go through it like butter. Cutting open your rubber takes quite a bit of strength and stamina from your hands and forearms. Take as many breaks as you need to - your piece isn't going anywhere. I actually didn't photograph any of it because it's a two hand (and I use my feet too for extra leverage!) job. Make long, clean slices. Try to not cut multiple paths in your rubber or you'll ruin your seams. This really is the part that requires the most skill of the whole process. Take your time and go carefully. Follow your guide lines - you're grateful you put them in now, aren't you!
Once I find my line on the back, I tend to go up the mane to the head next. It's usually simpler than weaving around the tail and back leg area. Work your way around the piece. It's tempting to get ahead of your inner seam by cutting more of the outside of the rubber, but don't. You need the outside to follow the inner seam's location. The more you have cut and the more you can pull your two rubber pieces apart, the more you can see and the easier it gets. You can stretch the rubber quite a bit so don't be afraid to do so. What you want to avoid, is moving the clay armature in a way that will poke into the rubber and damage the casting surface.
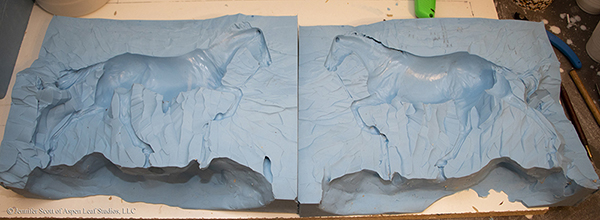
FINISHED! The mold halves look great with nice clean cutting around the actual horse itself. I lost my way a teeny bit on the tail so had to splice out some of the sprues. Overall, these will pair back together nicely and I don't expect any trouble spots. The casting will tell though! Block molds are a great way to find out what worked and what didn't work too so you can make the appropriate changes for when you clay up for a mold. Also, if (when) clay is stuck to the mold, just take a bit of goo-be-gone or something similar (test the product on a non-vital piece of the mold first) and wipe away the dissolved clay. Anise had left quite a bit of her butt on both pieces and it wiped right off like it always does. Do NOT try to scratch it off as you'll risk damaging your mold. Typically your first resin cast will do the rest of the cleaning if you left any small bits of clay in the mold. If you have a spot that didn't cast, check for a clay clog. :) Hoof tips, ear tips, and mane/tail tips are notorious for those!
You can't really see it, but there is a slice in the rubber running from the girth/lower chest, behind the raised leg,that runs all the way down the left front leg to the sprue opening. If I flex the rubber mold outwards, this area spreads apart, allowing me to pull that leg out of the mold.
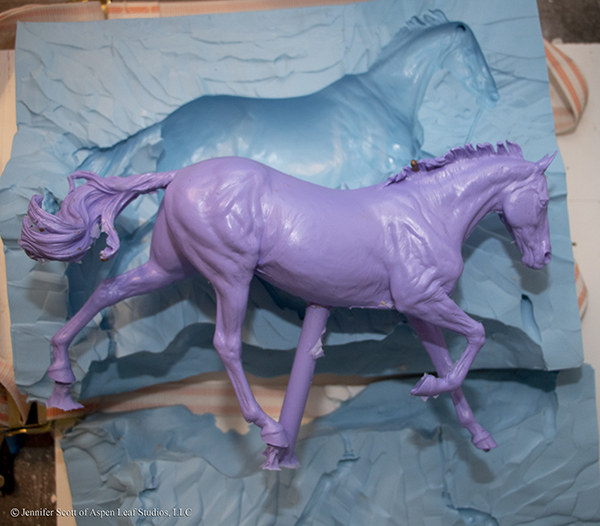
Here's my master cast! You can see a mane flip near the wither area that I forgot to remove clay from. Whoops! Rather than casting again, i can easily re-sculpt that with epoxy clay when I'm making my other adjustments and clean ups to the master. The Flashing - paper-thin resin along the seam lines, is easily removed with a carbide scraper or knife. I'll Dremel off the posts. Then it's time for Prepping 101.